
What is a Webhook?
If you’ve been involved in an IT Integration, you may have heard of webhooks – but if you’re not technical, you’re forgiven for not knowing what they are. In this post, we break webhooks down for the non-technical people and show you how they make your business run better.
A webhook typically involves a web service you can send data to. Most “REST” web services work on the principle that when an application makes a request to it, it does the work and returns a response. For example, to retrieve a list of business partners or customers from an application, you’d send a request to the web service endpoint for “business partners.” The request would likely be a GetList (which would provide a full list of customers) or GetByKey (which would require you to provide a customer code to get the customer’s details). You can usually expand this to most object types a system supports, including adding/updating business partners, sales orders, etc.
The issue with REST APIs is that they’re dependent on a third-party application requesting to do something (hence the name – unless they’re being told to do something, they’re resting!). REST APIs don’t proactively do anything, such as send notifications of events or changes, because they rely on the third-party application to detect changes.
That’s where webhooks come in. Webhooks are the opposite of REST APIs: Instead of waiting for a request, they actively respond when something happens. For example, if you add a new business partner into your ERP system, a webhook could automatically notify your CRM system about it. Another webhook benefit is that they don’t wait for a response from the system they’re sending notifications to – they fire, send the data, and forget. This has a positive effect on performance as long as the receiving system processes and error traps correctly.
Saltbox can either send webhooks using its universal API connector or consume (receive) webhooks with its webhook connector.
When Can/Should You Use Webhooks?
Webhooks are ideal if you need a one-way, real-time system integration. They can also trigger REST API calls. For example, a webhook from an ERP system might be in place when a customer is updated to send a notification via a webhook to an application that the customer has changed, but not provide any other details other than, say, the customer key. The receiving application then might perform a traditional GetByKey call and return all the other information regarding the customer. The subtle difference here is that even though a REST API is being used to return the data, the webhook initiated the process with a push or notification – it wasn’t reliant on the other system detecting a change to the customer.
Here’s a real-world example. You’re running an ERP back-office system with a separate field service management system for engineers. In this scenario, service calls are typically logged in the ERP system, but the data must be sent to the field service system to book engineers and send the details to an engineer’s device. You can set up a webhook to send the data to the field service management (FSM) software when a call is added or updated in the ERP system. Because the initial send of data doesn’t require a response from the FSM system, a webhook works perfectly.
Another scenario is price updates in an eCommerce system. If a user updates prices in the eCommerce system, that information must be sent to the ERP system. After the eCommerce system has sent the data, it has no further work to do and doesn’t need a response from the ERP system, so a webhook is perfect.
Learn more about Saltbox and how it can help you use webhooks below.

How Can You Use Webhooks in Saltbox?
First, enable your project. Your implementation consultant can set this up for you and explain how to access your workflows via webhooks (i.e., the URLs you’ll need to call).
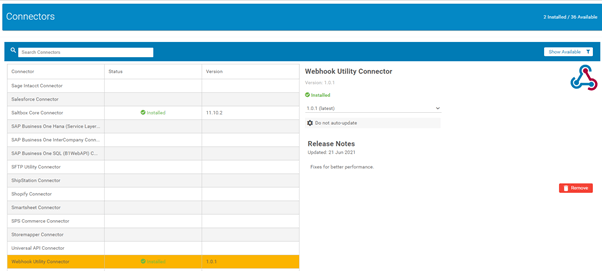
Then, install the webhooks utility connector in your project connectors.
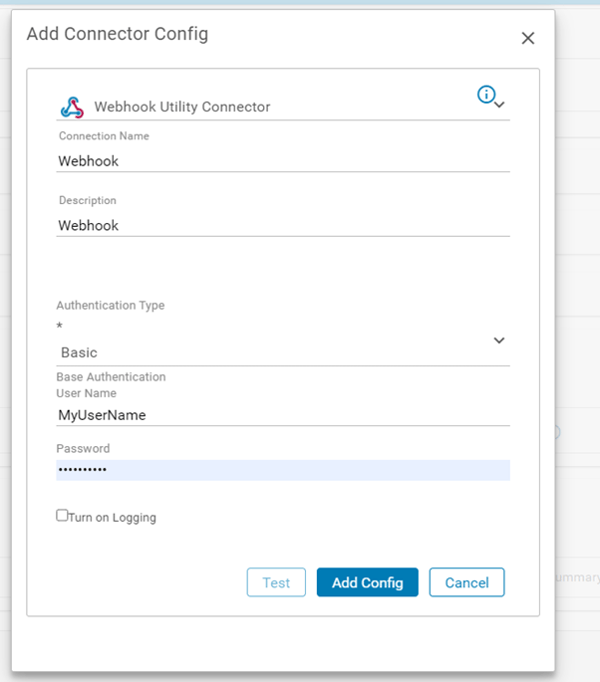
Next, configure your webhook’s security by going to the project settings>connector configuration for your webhook connector. There are several authentication options: basic, HMAC, header, or no authentication. (We don’t recommend using no authentication.) In the screenshot below, you can see a basic authentication and where you’ll set your username and password for the process or application you’ll need to use to call the webhook.
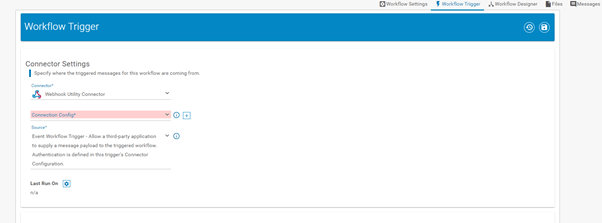
You can now create a workflow and name it and any workflow settings you need. Then, go to the trigger. Select the webhook utility connector, and the source will automatically default to ‘event workflow trigger,’ which is correct.
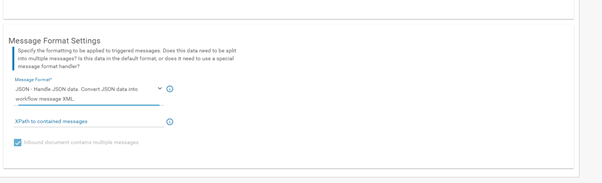
In the message format of the workflow trigger, select the message format you’ll be sending in the payload of your webhook. Typically, the formats are JSON or XML; we chose JSON in the screenshot below.
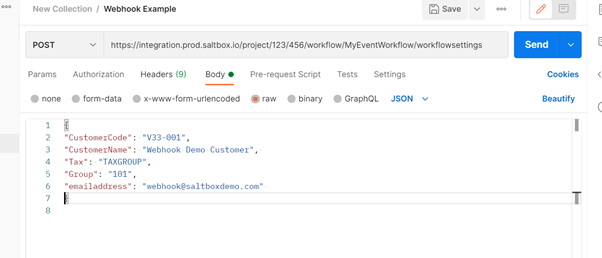
Next, call your webhook workflow from an external application and transmit a sample of payload data you’ll be sending to your webhook workflow. We do this now to see the data in Saltbox, which in the next stage will allow us to use the visual data mapper to map to another Saltbox connector. This can be done with the application that’s calling the webhook or a developer tool such as postman, as you can see in this example.
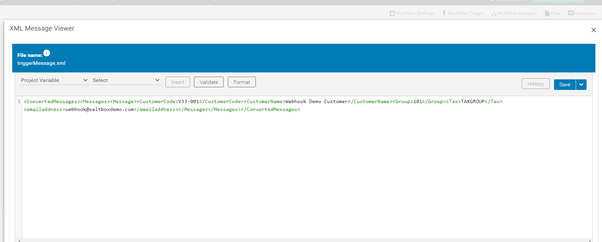
In Saltbox, go to your project’s workflow messages, see that the workflow ran, and review the data sent in the payload of the webhook call. (Regardless of which data format is sent, Saltbox converts to XML.) You can save this file, and it will be available as a source data set for use in visual data mapper.
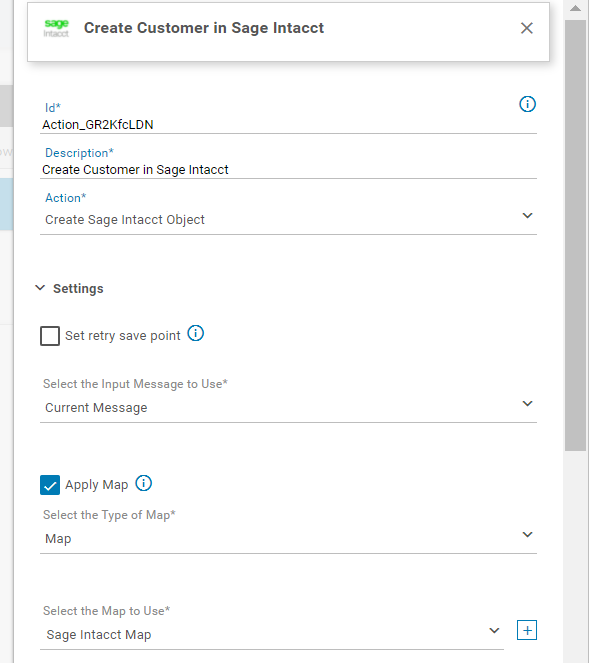
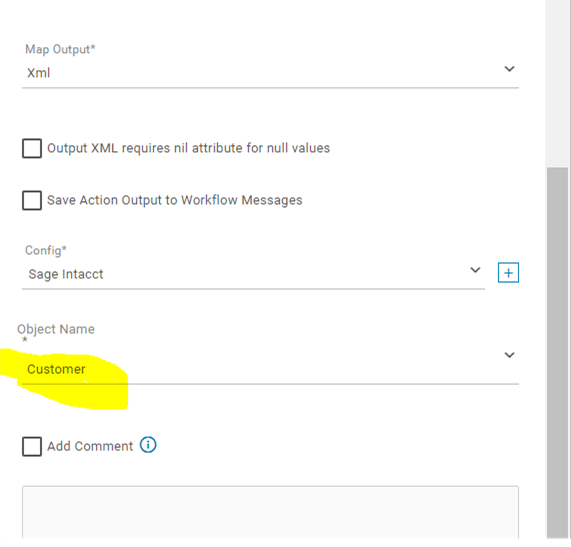
Now, go to your workflow designer, add an action that would use a Saltbox connector (system) of your choice to send the data to. Below, we used Sage Intacct. Set the object you want to create/update – in this case, a customer – and choose to use a map. Then, name it.
Proceed to the visual data mapper for the action and create a map from your source data file to your target system.
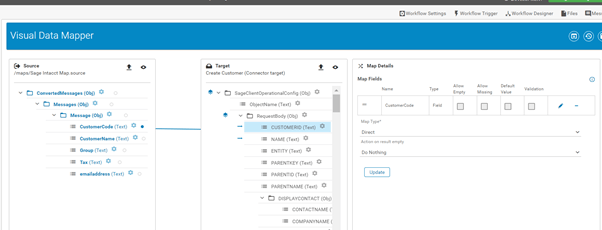
That’s it! Save the workflow, and next time you run it, the desired actions should complete with the data. In this example, we created a new customer in Sage Intacct.
With Saltbox and webhooks, you have a world of integration possibilities, limited only by your imagination.
